
SPF, DKIM and DMARC are DNS records that prove email from your domain really came from you. Gmail, Outlook and Yahoo now expect them, and without them your emails are much more likely to land in spam or be rejected.
What Each One Does
- SPF: lists the servers allowed to send email for your domain
- DKIM: adds a digital signature to every email, so receivers can tell it wasn't changed
- DMARC: tells receivers what to do with email that fails SPF or DKIM, and sends you reports
Step 1: Check SPF and DKIM in cPanel
If your domain uses AISweb nameservers, cPanel can set up SPF and DKIM for you.
- Log in to cPanel (see How to Log In to cPanel)
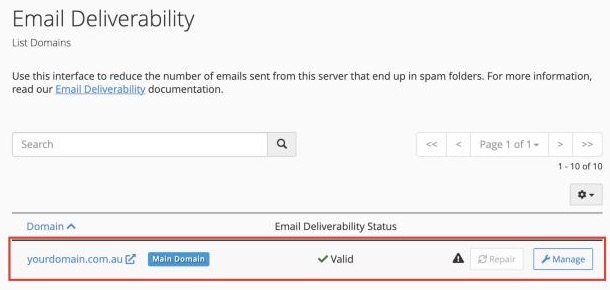
- In the Email section, click Email Deliverability
- Find your domain. If it says Valid with a green tick, you're all set
- If it shows a problem, click Repair and then Repair again to confirm
Step 2: Add a DMARC Record
- In cPanel, go to Zone Editor in the Domains section
- Click Manage next to your domain
- Click + Add Record and choose Add TXT Record
- Enter:
- Name:
_dmarc.yourdomain.com.au. - Record:
v=DMARC1; p=none; rua=mailto:you@yourdomain.com.au
- Name:
- Click Save Record
Replace yourdomain.com.au and you@yourdomain.com.au with your own domain and an address you check.
p=none means "just report, don't block anything", which is the safe way to start. Once you're sure all your real email passes, you can change it to p=quarantine (send failures to spam) for stronger protection.
If Your DNS Is Somewhere Else
If your domain uses another DNS provider, such as Cloudflare, cPanel can't add these records for you. Click Manage next to the domain in Email Deliverability to see the exact SPF and DKIM records, then add them at your DNS provider.
Checking It Worked
Send an email from your account to a Gmail address. In Gmail, open it, click the three dots and choose Show original. You should see PASS next to SPF, DKIM and DMARC.